The Key Notch
In some cases, trees are hung or snagged because they have been uprooted. In these situations determining where the loads are concentrated can be difficult, and often the root plate is a stronger force to be considered than the hung tree itself. Gravity is always acting on mass and never takes a day off.
This uncertain circumstance presents challenges that must be considered when attempting to cut the tree free from obstacles. The main focus of the cuts I have described in my past two articles (mis-match cut and controlled hinge release) has been to allow the cutter to be at a safe distance when the final cut is released and the tree falls and is cleared from its snagged position. The use of rope and mechanical advantage allows cuts to be released in a controlled manner and the tree to be pulled from a safe working distance while trying to free it. For safety’s sake always plan, prepare and use an escape route. Avoid cutting and releasing a snagged tree while standing next to it by creating a barrier using distance and rope. The further away you are from the snagged tree, the better (within reason), but a good rule of thumb is to be a distance away that is equal to the height of the snagged tree.
The key notch is a technique for freeing a hung or snagged tree that releases all holding wood while maintaining control until a pull force is applied. It takes some time to cut and works well on trees that are hung and snagged where the compression and tension forces are very difficult to identify, such as with uprooted trees.
First evaluate and determine the zones most likely under compression and tension. In the case of an uprooted tree, the compression and tension zones can be exactly opposite that of a tree in the same hung or snagged position that is not uprooted. The techniques of the key notch will work the same for either situation. This is why it works well for trees where it is difficult to determine how much force the root plate is applying.
The key notch is made by making five cuts into the trunk; the first three cuts utilize the bore cut technique, cutting through the trunk and forming a tongue and groove – or ‘key’. The tongue and side of the groove should be of equal size or thickness. This is determined by dividing the trunk diameter into three equal parts. In order to properly form the key notch, it is necessary that the trunk be at least three times the diameter of your chainsaw bar width.
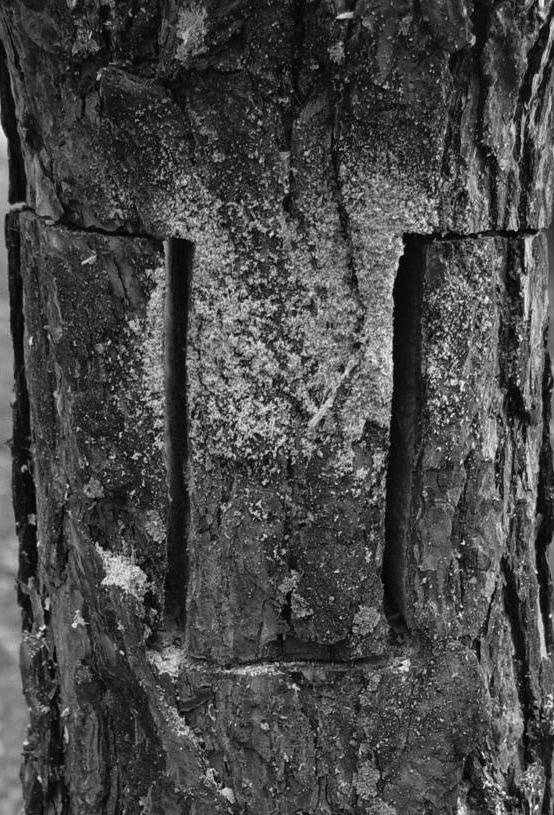 Before making the final two cuts, wedges are installed to prevent saw bind and pinch. The wedges are placed under the tongue on both sides of the trunk and wedges can also be inserted into the sides of the key as well. This requires several wedges, but a minimum of two will often work. The fourth cut is made in the compression zone and the final cut should be placed in the area of the trunk that is determined to be under tension. By releasing a load in tension the kerf should open and allow the key notch to be completed without any bar pinching.
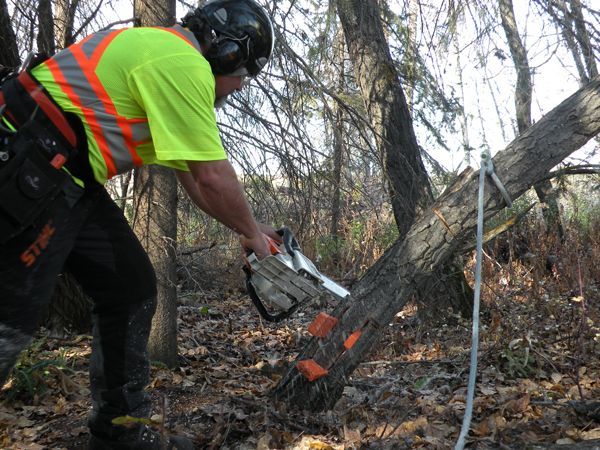
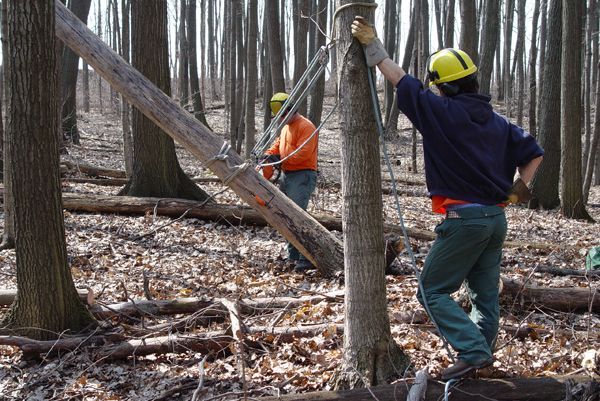
Once the cuts are completed the worker should retreat to a safe working distance and pull the snagged tree out of the key, using a pre-installed pull line. Pulling the tree out of the key may require more force than one person can apply and that is where mechanical advantage is incorporated into the pull.
It is my intention in writing these articles and sharing techniques, to add tools and techniques to the mental toolboxes of workers who use chainsaws to cut trees that are hung and snagged during or after storm events. I realize that there are many different tools and techniques and I always encourage workers to stick with ones that have worked well for you. I also equally encourage everyone to always keep an open mind and give new techniques a chance and a try. See if they work for you, and when they do you have another tool for the toolbox!